Hemming
The very first thing we're going to do is finish the whole bottom length of the dress. Open out the facings, and overlock or zigzag the raw edge. No fraying here please!
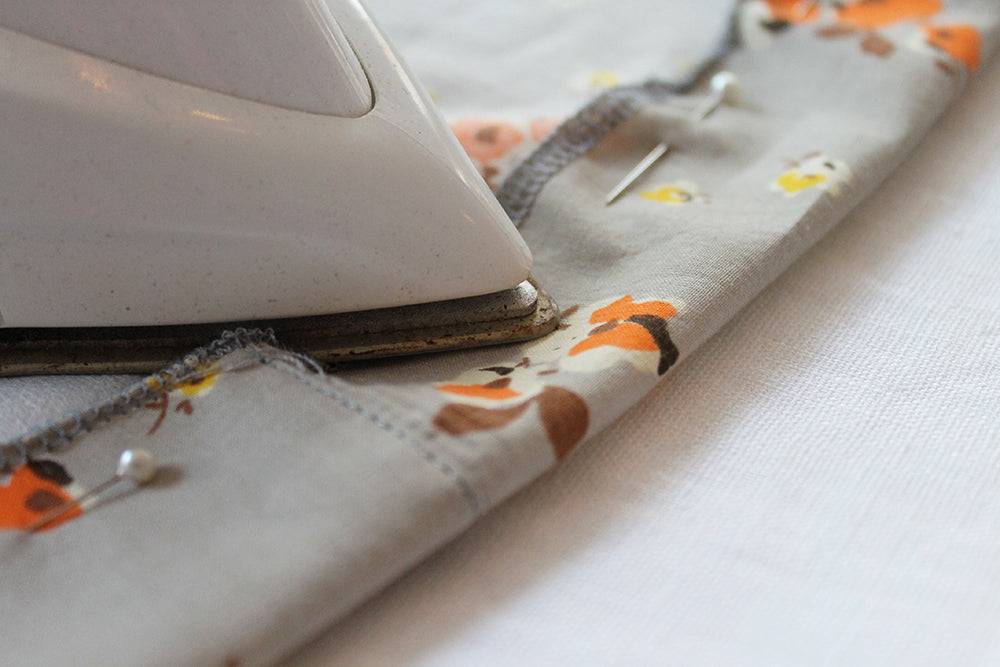
With the facing still open, pin the hem up by 4cm and give it a good press in place.
For the neatest results we always like to hand stitch our hems up - so that's what we're doing. If you prefer to sew your hem in place using your sewing machine however, by all means go for it! (But seriously...hand stitching is so much nicer!)

A simple slipstitch is all it takes!

Once you have sewn the hem in place all the way round, fold the facing back to the inside of the dress, and press.

To keep it secured to the inside, slipstitch the facing edge to the hem. Be careful that none of your stitches end up on the outside of your dress. (At this point it would also be a good idea to slipstich the facing to the seam allowances at the shoulder seams and the waist too!)

And that's the hem done!
Buttonholes
Most machines nowadays come with a one-step buttonhole function, so that's what we're going to be using here. It's great - it does all the work for you!
First thing's first, let's decided where you want the buttons to sit on your dress.
We thoroughly recommend having a button at your bust point (in line with the nipples!). It's the best way to avoid a gapey peephole situation...

So try your dress on and on the right hand side of the dress, place a couple of pins at either side of where you want the button to sit. We are using 16mm wide buttons, so our pins are placed this width apart. If you are using smaller buttons adjust your pins accordingly. You'll want your buttons around 1.5cm away from the front edge of the dress.

The waistline is also prone to gaping, so you'll want to pop a button here. (We love Emmie's tutorial on eliminating waist gape by adding a "backwards button" at the waist - check it out!)

Using these two buttons as a guide, evenly space the rest of the buttons along the front of the dress. Depending on how many buttonholes you want to make, use as many buttons as you like. Just make sure they're evenly spaced.
Once you have got your placement sorted, use tailor's chalk to mark the buttonholes on the fabric. Make sure to keep them 1.5cm from the edge.
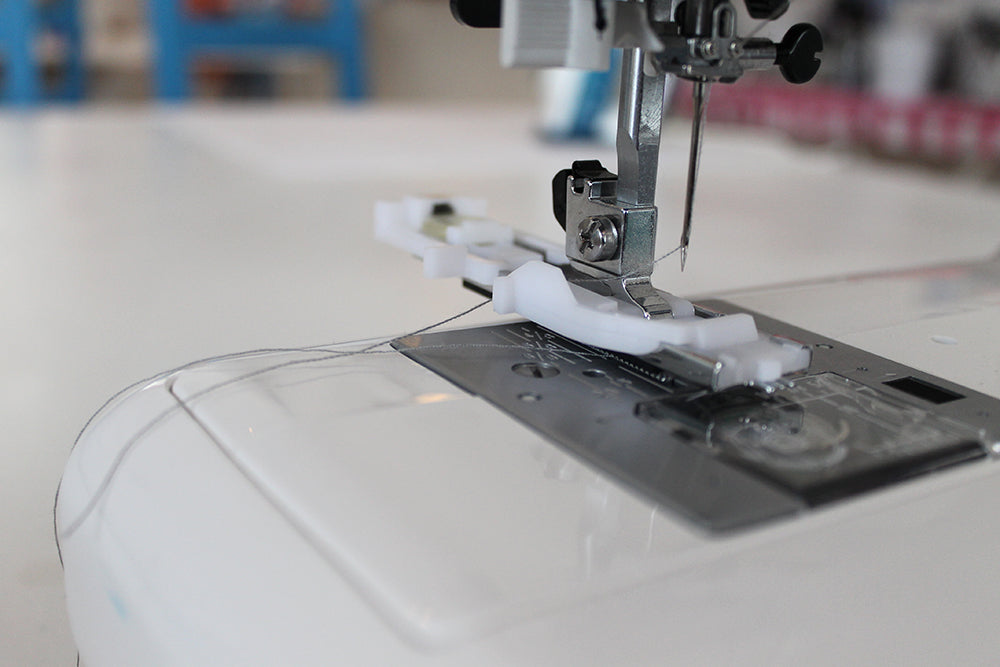
Place one of your buttons into your one-step buttonhole foot and make sure it's closed and being held in place. Then, with the button at the back, attach your buttonhole foot to your sewing machine. The foot uses the button width to work out how big to make the buttonhole - very clever!
Set your machine to the buttonhole stitch. On the Janomes we use you can choose from a rounded, squared-off or keyhole style buttonhole. (The keyhole shape is usually reserved for heavier fabrics and used on jackets and coats, but choose whichever one you prefer.)
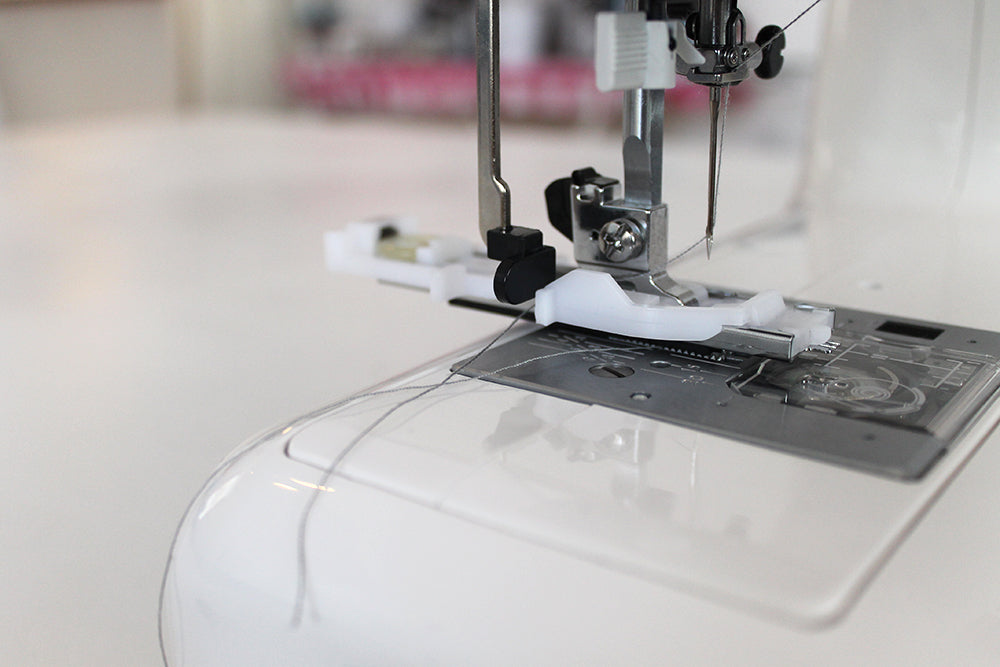
One more thing before we can get going. If you have never done buttonholes before, you may never have noticed this little lever. Inside the machine, next to the needle holder, is a buttonhole guide which you need to pull down as much as it will allow. This works as a sensor and tells your machine when to change stitching direction.
It's time to start stitching - this bit is magical! Lining up the needle with the bottom of the buttonhole marking on your dress, lower your presser foot and press down on your foot pedal to begin sewing.

Keep your foot pressed down until the buttonhole is completely sewn. The sewing machine and buttonhole foot should do all the work for you! Your machine will stop sewing automatically, and it might even beep to let you know.

Repeat this step for all of your buttonholes. (It is a good idea to reset the buttonhole function in between each button as sometimes they can get confused. You can reset it by turning your machine off and back on again - don't forget to reset the stitch type to the buttonhole option.)

Once all the buttonholes are done it's time for the scary bit, slicing them open! Poke your seam ripper through one end of the buttonhole, and very slowly and carefully, slice the hole open. If you're worried you might slip and splice through the stitching, place a horizontal pin in across the end of the buttonhole to stop yourself from cutting too far - we've all done it!
Now all the buttonholes are prepared, it's a much simpler matter of sewing the buttons onto the left hand side of the dress. To make sure you line the buttons up correctly with the holes, lay the right hand side of the dress over the left, overlapping by 1.5cm. You might want to pop a few pins in to keep it in place. Then use tailor's chalk to draw through the holes onto the left hand side underneath.
Using these markings, handstitch your buttons in place. And then voila! That's the buttonholes and buttons finished, and your dress is all done!
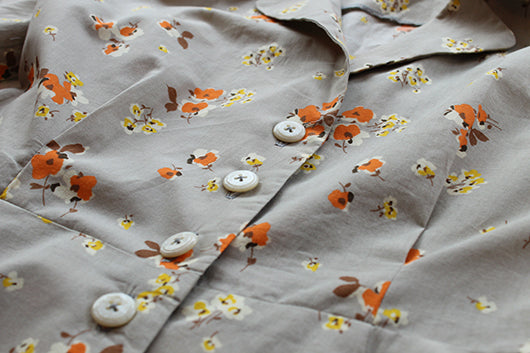
Well done! Now throw that dress on and off you frolic!
Need some help?
If you are stuck with your Vintage Shirt Dress at any point, don't suffer in silence. Give us a shout. You can catch us on Facebook, Twitter, Instagram or by email.
Need some Vintage Shirt Dress inspiration? Then make sure you check out our Vintage Shirt Dress board on Pinterest - it's brimming with lots of inspiration as well as a few of your makes! Go have a look!