In this Sewalong we are going to show you how to sew the kick pleat (sometimes called a vent or split) for the Ultimate Pencil Skirt. It's a nice simple pattern, totally tackle-able by an advanced beginner, but we know sewing a kick pleat is something a lot of you will not have come across before. So we thought we'd go through it in a bit more detail.

This tutorial will translate to a lot of skirt and dress patterns, so if you're a pencil skirt fan in general, read on, this could be useful...
If you are making the Ultimate Pencil Skirt, by this point you should have your darts, side seams, zip, centre back seam and facing sewn. So you should have something that looks a bit like this...
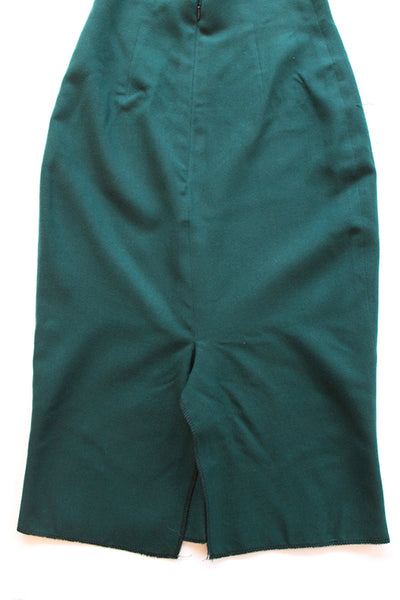
With your skirt the right way out, finish your hem using a zigzag stitch or overlocker all the way around.
The hem has an obvious turn-up point (where the bottom of the skirt comes in), about 5cm from the bottom edge. Using this as your guide, fold the hem up once at either side of the kick pleat and pin. We are only working at either side of the kick pleat for now, so you only need to pin a little bit on each side.
Because one side of the kick pleat will be showing when the skirt is worn, and one side will be hidden, we are going to treat these two sides differently.

Starting with the left hand side, use a fabric marker to draw a vertical line down the folded hemline, at 4.5cm in from the edge of the pleat. As a guide, if you extend this line it should match up with the centre back seam.
On the right hand side, do the same but this time at 1cm in from the edge. You will be able to use your seam allowance guide to help with this one, but it still helps to draw the line.
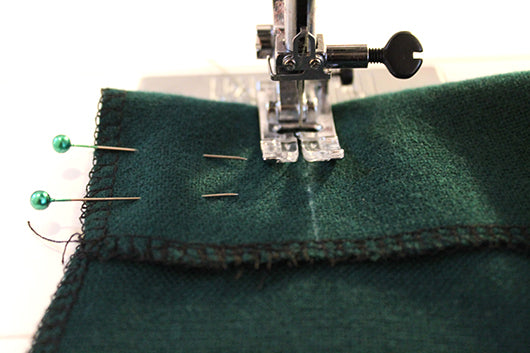
Sew both sides of the kick pleat, using the chalk mark as a guide for your needle. Don't forget to backstitch, and try to stop exactly at the finished edge.
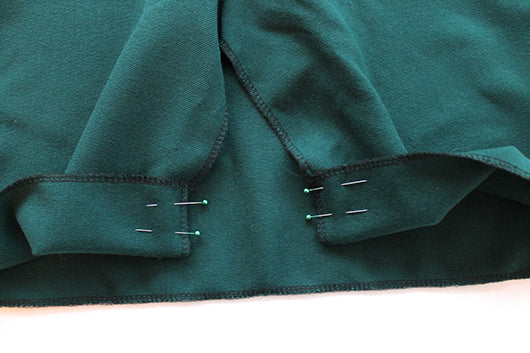
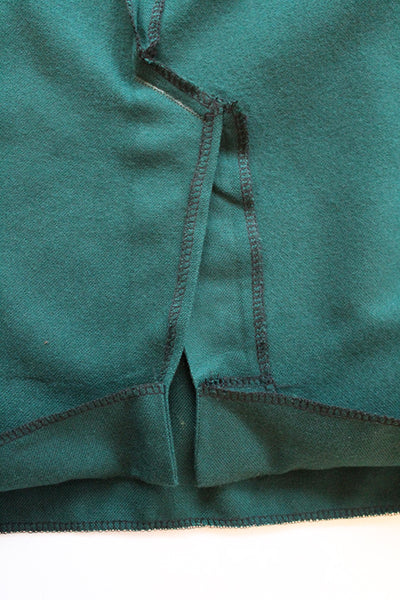
Turn both sides of the kick pleat the right way out. It should now look something like this...
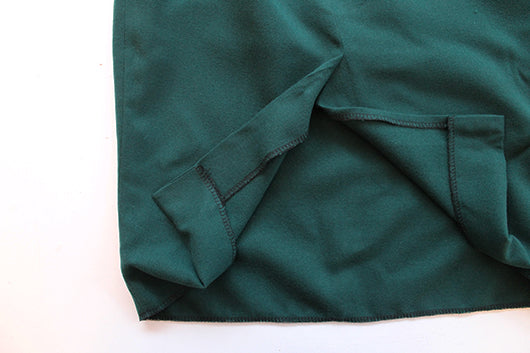
Above shows the kick pleat opened out.
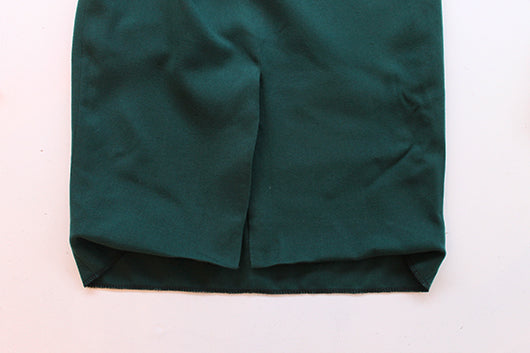
And this is what it looks like closed.
If you need to, use a big knitting needle to push out the corners. You want them nice and sharp. (Be gentle though, you don't want to make a hole after all this work!) Give each side of the kick pleat a really good press up from the corner to the top.
Now we need to secure the kick pleat in place.
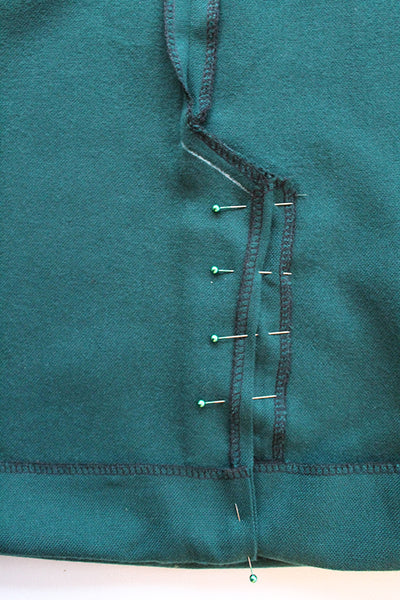
With the skirt inside out, fold the left hand side of the kick pleat over on top of the right. To keep the layers in place as you sew, pin through both sides of the kick pleat, securing them together.
With your fabric marker, draw another line along the same line of stitching you sewed along the top of the pleat earlier. Stop 1cm before you reach the edge of the overlocking stitches, as shown above.
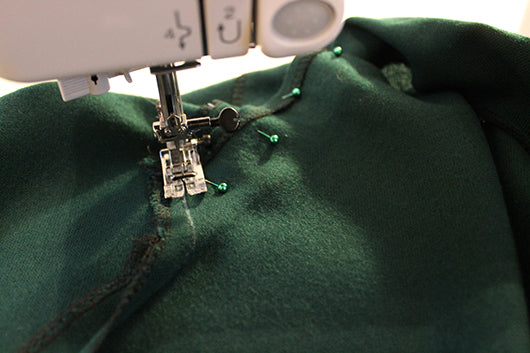
Carefully take the skirt to your sewing machine, making sure to keep the kick pleat secured together with the pins. On the wrong side of the skirt, sew along the chalk line you have just drawn. If you can, it might help to remove the free arm from your machine to help avoid sewing through the front of the skirt.
The kick pleat should now be secured at the top, and look something like the above picture.
Press the top of the pleat to set the stitches.
You will notice now that the seam allowance is buckling at the top of the kick pleat, and can't sit flat.
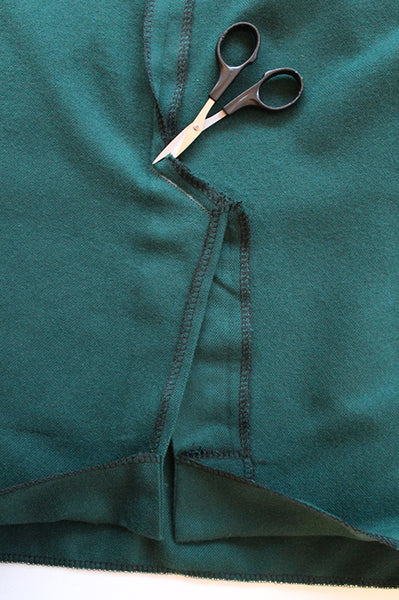
With a little pair of scissors, cut a snip on either side of the seam allowance, right at the corner. This will release the tension and allow the seam allowances to sit properly.
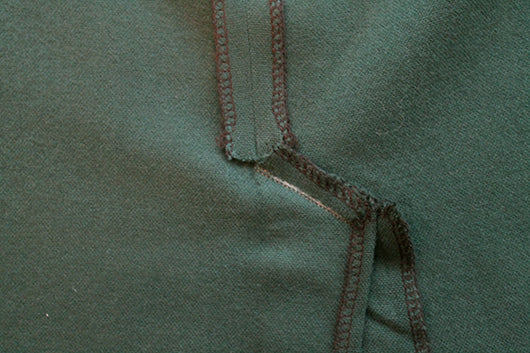
Re-press the centre back seam allowance open, and press the seam allowance at the top of the kick pleat upwards.
And that's the kick pleat done!
Now all you need to do is the hem.
Turn the rest of the hem up all the way around the skirt, following the pressed edges at either side of the kick pleat. Press them hem and pin in place.
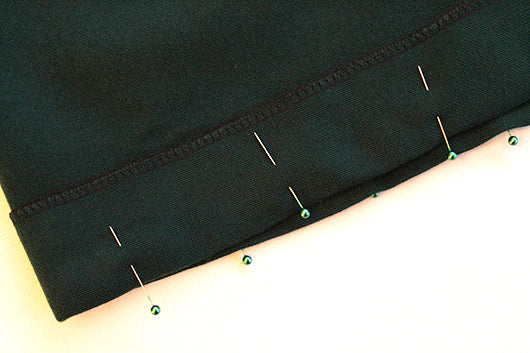
To give your skirt the nicest finish, we can't resist a hand finished hem. Slipstitch the hem in place, trying and keep your stitches on the outside as teeny tiny as possible so they are invisible.

Give it another press and then ta-da! Your skirt is finished!
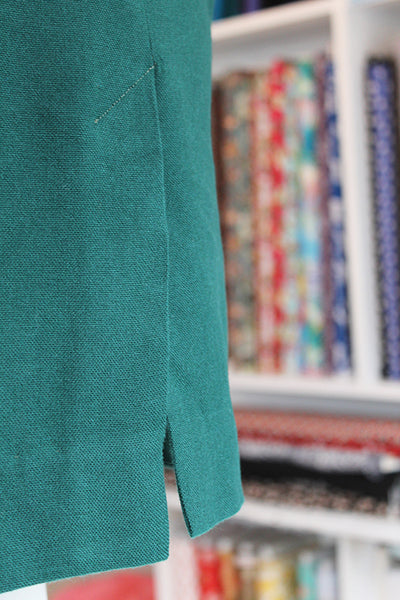
Don't forget to share your finished Ultimate Pencil Skirt on Instagram using the hashtag #soiultimatepencilskirt.
Happy sewing!