Lowering the Betty Dress neckline
To start with you will need your Betty Dress front and back bodice and facing pattern pieces. We have traced them off so that our original pattern stays intact.
To create a lower neckline for the Betty Dress, choose how low you'd like the scoop and measure this distance down from the centre front. We went for 5cm, which gives a nice slightly scooped look. If you're planning on making the neckline dramatically lower it may lead to some gaping across the front of the dress, so it'll be best to make a toile first.

Draw in your new neckline by squaring off from the centre front line by at least 2cm before you start drawing your new curve in to meet the shoulder seam. If the neckline isn't started on a straight line you'll end up with a v-shape at the centre front rather than a nice smooth curve.

We like to use a pattern master or a french curve to draw in the new neckline.
Cut along the line you have just drawn - that's your new scooped Betty front bodice piece!
Creating the lining pattern pieces
So that your facing pieces match your new scooped neckline, lay your front bodice piece over your front facing, and copy the new curve onto the facing.

For the lining pieces, place the facing pattern on top of the bodice front and back pattern pieces and trace off the the bottom line of the facing onto the bodice pieces.

The bottom part then becomes your lining pattern piece.
Because you are creating new pattern pieces, you will need to add seam allowances.

We've added 1cm to the bottom of the facing and 1cm to the top and bottom of the lining pieces. It is easiest to use a pattern master to do this.
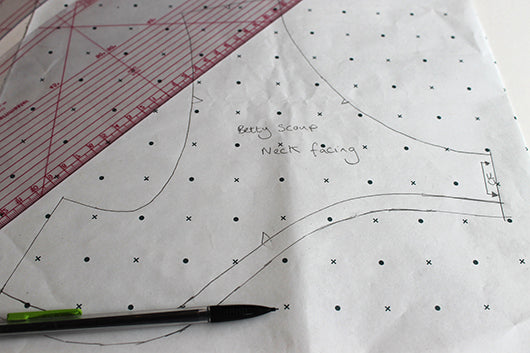
As the seam allowance for the side seams and waist seam is already included on the original Betty pattern, you don't need to worry about adding any here.

Sew the bodice shell together as per the Betty Dress instructions and pop the lining pieces to one side - we'll get to these in a bit!
Creating and attaching the skirt
For the skirt we used the full width of a 150cm wide fabric, measuring down from waist to knee for our desired length, plus 3cm for the seam allowance.
Trim off the selvedge and cut one of the skirt panels in half to create the centre back seam. You will then have three panels for your skirt, one for the front and two for the back.

Stitch the skirt together at the side seams.
Divide the skirt up into four sections: centre back to side seam, side seam to centre front, and the same on the other side. Mark the sections with a pin or tailors' chalk. Do the same to the bodice. Doing this will help us to distribute the gathers evenly.
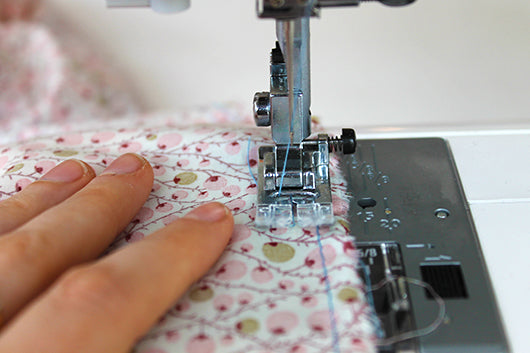
Set your sewing machine to a long stitch length and start sewing your gathering stitches. The gathers are done section by section, as although it does take a bit longer to do it this way, you're less likely to break the thread as you're pulling the skirt in. It also makes for an easy distribution of the gathers.

We like to stitch three lines of gathering rows as it makes it easier to pull in the skirt and leaves you with nice even gathers. If you stitch just inside the seam allowance you won't have to unpick any of the gathering stitches when you attach the bodice to the skirt.
Attach the skirt to the bodice by first pinning the skirt to the bodice at the marked points you've made.

Then, section by section, gather the skirt by pulling the thread, until it fits the bodice.
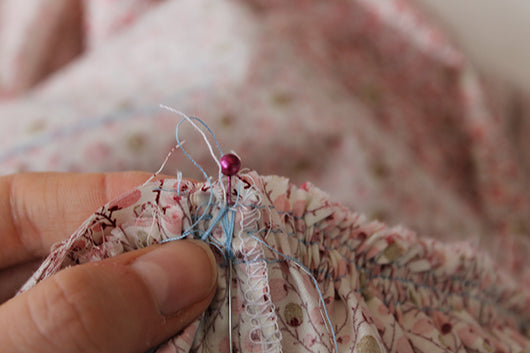
Once you get to the end of a section make a figure of eight with the excess thread by wrapping the thread you've pulled round a pin. This stops the gathers from unraveling as you work on the other sections and allows you to go back and move the gathers until you get them where you want to sit.

With the machine still set to a larger stitch, tack the skirt to the bodice. This stops everything moving about as you sew. Once this is done, set the machine back to the normal stitch length and attach the bodice to the skirt.
Creating the facing and attaching the lining
Using the instructions in the booklet, insert the invisible zip into the dress. Assemble the facing as per the instructions and attach it to the bodice. Now we are ready to create and attach the lining.

Sew the darts in the front and back lining pieces and then, using a 1.5cm seam allowance, sew the side seams so you have one long lining piece.
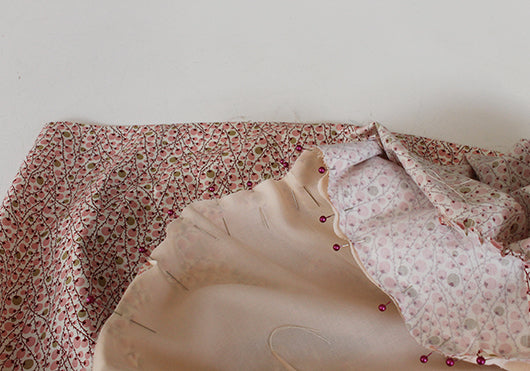
Pin the lining piece to the facing, right sides together, matching the side seams as you go. As there is quite a curve on the lining pieces you may want to tack them before you sew them together but if you're feeling confident go ahead and get stuck in straight away.
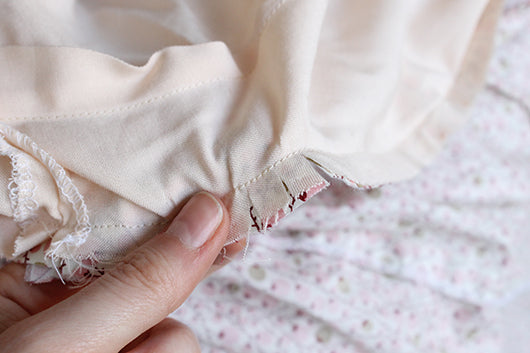
Clip the curves on the seam allowance and give the seam a good press.

To enclose all the raw edges on the inside of the bodice we now need to slipstitch the lining to the centre back seam and waist seam.

Fold the lining back by 1.5cm at the centre back and along the bottom edge and press to create a crease. Pin the lining to the zip tape along the centre back seams.

Repeat for the long bottom edge, before slipstitching the whole lining in place.

To hem your dress create a double hem by turning it up by 1.5cm and then a further 1.5cm. Slipstitch or machine sew before giving the whole dress a good press.


And voila!
You have created your very own scoop-necked, fully-lined and gathered skirted Betty Dress!


Don't forget, if you fancy having a go at this pattern hack, remember to enter your finished dress into our #SOIshowoff competition. Every month you'll get the chance to win 2m of fabric of your choice!