Today we're back with the second half of the Joan Dress sewalong, and guiding you through arguably the most tricky part of the construction - sewing a kick pleat (or vent) into a fully-lined dress. If you missed the first part, creating and attaching the neck tie collar, you can find it here.
When we had the pattern tested the kick pleat was the part that people struggled with the most - it can be rather mind-boggling if you haven't done it before. (Actually that applies to quite a lot of things in sewing..!)

However, although tricky, the kick pleat is kiiind of essential if you want to be able to walk in your Joan Dress, so we're going to go through how to assemble it, sewing it firmly in place and then hemming the dress.
Let's get to it!
Make sure the dress is the right way out. The skirt lining will be loose inside the dress, as currently it is only attached at the sleeve hems and neckline. Pull the lining out from the bottom of the dress (not through the top or centre back seam).

Let's start on the right hand side of the dress, which is the straight side with no kick pleat extension. Place the lining and the main dress fabric right sides together, and pin from the hem to the cross marking the top of the kick pleat.
Sew this seam with a 1.5cm seam allowance.

Turn this part of the dress the right way out and press the seam allowances towards the lining. Trim them down by half before understitching the seam allowance to the lining side.

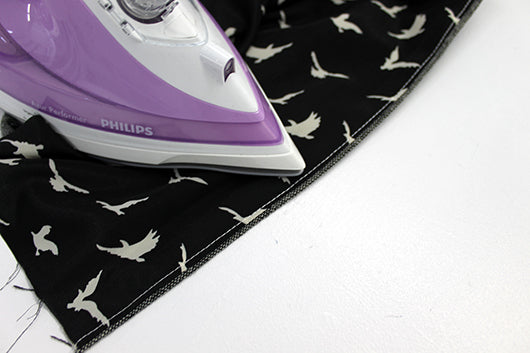
So that the seam line remains invisible on the outside of the dress, roll the seam to the inside and press.
Now let's move onto the other side of the kick pleat.

Again, make sure the dress is the right way out and pull the left side of the lining out through the bottom of the dress. With right sides together, pin the lining to the dress around the kick pleat, from the cross at the top to the hem.

Sew this seam with a 1.5cm seam allowance, pivoting at the corner. (To pivot, lower your needle into the fabric, lift up the presser foot and manoeuvre the fabric into the correct position.)

As shown in the instruction booklet, once this seam is sewn, snip into the seam allowance at the corner. This will release the tension on the seam when the kick pleat is turned the right way out.

Trim the seam allowance down by half and press it as much as you can towards the lining.

Open the kick pleat out and, starting at the hem, understitch up towards the kick pleat pivot point. You won't be able to reach up to the top, but go as far as you can, before backstitching.

As we did on the other side of the kick pleat, roll the seam line to the inside of the dress and press in place.
And that's the first part done!
Now we need to sew up the middle section of the lining, from the bottom of the zip to the top of the kick pleat.
Although the lining is secured in place at the top and bottom of the dress, it is still possible to access it through the centre back seam. Pull the lining out through the centre back seam and snip a notch into the seam allowance at the bottom of the zip. It is from this point that we are going to sew the seam.

From this notch, place the right sides of the lining together and pin this short distance. Then using a 1.5cm seam allowance, sew from this point down to the top of the kick pleat, remembering to backstitch and the beginning and end.
Fold the lining back inside the dress and make sure the corner of the kick pleat is properly pushed out and it's sitting as flat as possible.
Now comes the tricky bit, securing the kick pleat in place.
With the whole dress inside out, fold the right hand side of the kick pleat over the left hand side, making sure that the edge of the hidden left hand side part is straight, in line with the whole centre back seam.

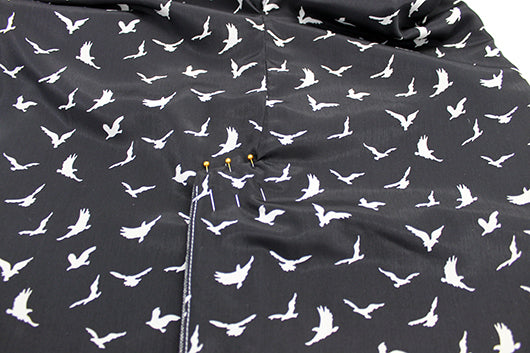
From the wrong side of the dress, pin the right hand side in position, pinning through all layers to the outside of the dress.
Sewing parallel to the top edge of the kick pleat, and staying as close to the edge as you can, top stitch the kick pleat in place. As this stitching will show on the outside of the dress, it is important that the line is straight. Backstitch at the beginning and end, as neatly as possible! (If you find this part difficult you can instead use a 1.5cm seam allowance to stitch the pleat down, as described in the instructions. As you can use the guides on your throat plate to do this, it should make it easier to sew in a straight line.)


Once the kick pleat is stitched in place it will be secure from the outside and look very professional indeed!
Now all that's left to do is the hem!
To get a perfect finish, first it's a good idea to tack the lining and the dress fabric together along them hem. With wrong sides together, starting at one side of the kick pleat, pin and sew all the way around to the other side of the kick pleat, using a long stitch length.

Once it is tacked in place, fold the hem up to the inside of the dress by 1.5cm and press. Fold it up again by 3.5cm and press, pinning to hold it in place.

Slip stitching the whole hem in place.

(You can of course machine stitch the hem but trust us, after all the trouble you've gone to to get to this point, slip stitching will give you a neat and beautiful finish from the outside!)

And while you've got needle in hand, you might as well catch the lining to the inside of the dress, and slip stitch the dress closed down the centre back seams. If you'd like you can add a hook and eye to the top of the dress, before finally throwing the dress on, and tying that elegant necktie!

And that's it! You're all ready for a fancy meal out, that trip to the ballet or perhaps you've got a wedding coming up? Whatever the occasion we hope you love your Joan Dress!

We'd love to see your finished dresses so share them with us on Facebook, Twitter and Instagram! Also don't forget to enter them into our #SOIshowoff competition which we hold every month. Tag your pictures with #SOIshowoff and you will be in with a chance to win 2m of fabric of your choice from our online shop.
