Did you know that many of our PDF sewing patterns are layered? This means you can select your specific size(s) from the PDF pattern file, so you only print the one(s) you need!
What are PDF patterns?
PDF patterns are downloadable patterns which you can print at home on a normal domestic printer. You then assemble them together with glue or sellotape, and use them straight away to start your sewing project.
The instructions come in a separate file so that you don't have to print these if you don't want to. We're big fans of saving paper and helping the environment where we can, so we personally prefer to just read them off our laptops, tablets or phones.
Read on to find out how to isolate your size before printing then learn how to assemble your printed PDF pattern on this blog post or with a free video tutorial on Stitch School.
Saving and opening your PDF pattern correctly
The first thing that you want to do is download your PDF pattern in the A4 or US Letter version and save it into a new folder on your computer, removing it from your Downloads. On our computers, when you download something, a linked button appears at the bottom of our browser (Chrome, Firefox, Safari etc) screen. When you click on this button, the file will open, but it will open in your browser. So always go to your Downloads folder and copy and paste the file into a new folder (in your Documents for example). Then you can right click on the file and choose Open With... Adobe Acrobat Reader. (If you don't have this software you can download it for free here.)
In the pictures below we've used the A0 file for an overall view of the pattern file. Please note that your A4/US letter file will show as individual sheets rather than one large one, but the effects of the following steps will be the same, you will end up printing only the size(s) you've selected.
Viewing your PDF pattern layers
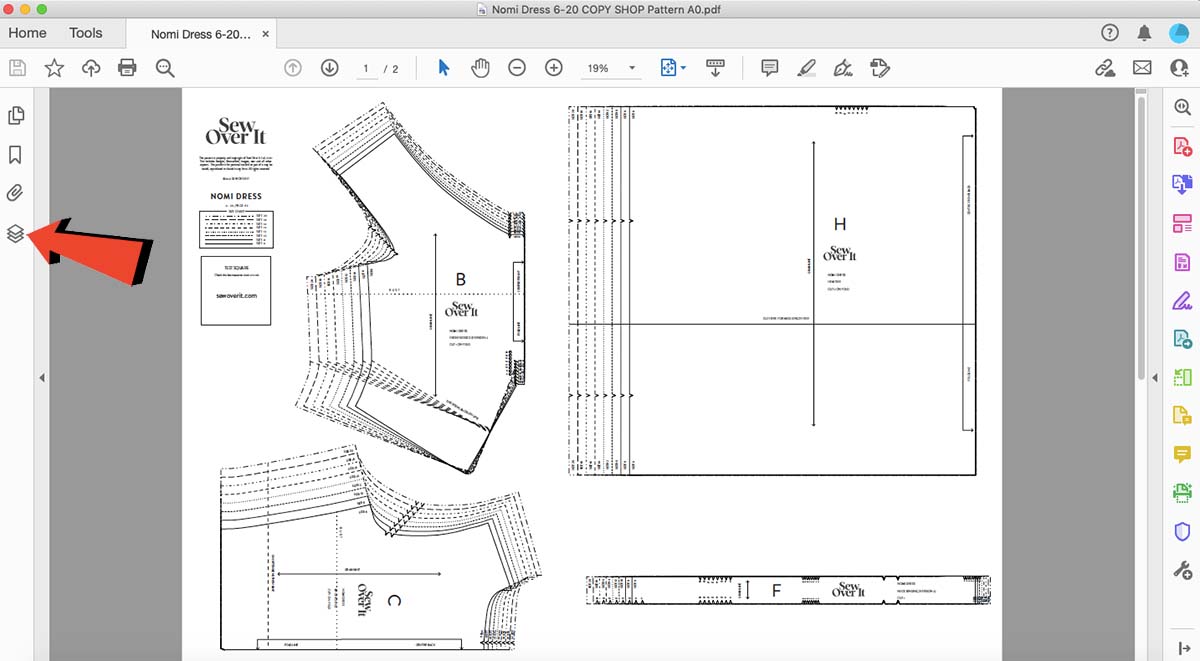
Once you have opened the file in Adobe Acrobat Reader, you should see a few icons on the left of the Acrobat Reader window. Select the Layers icon which looks like three sheets of paper stacked on top of each other.
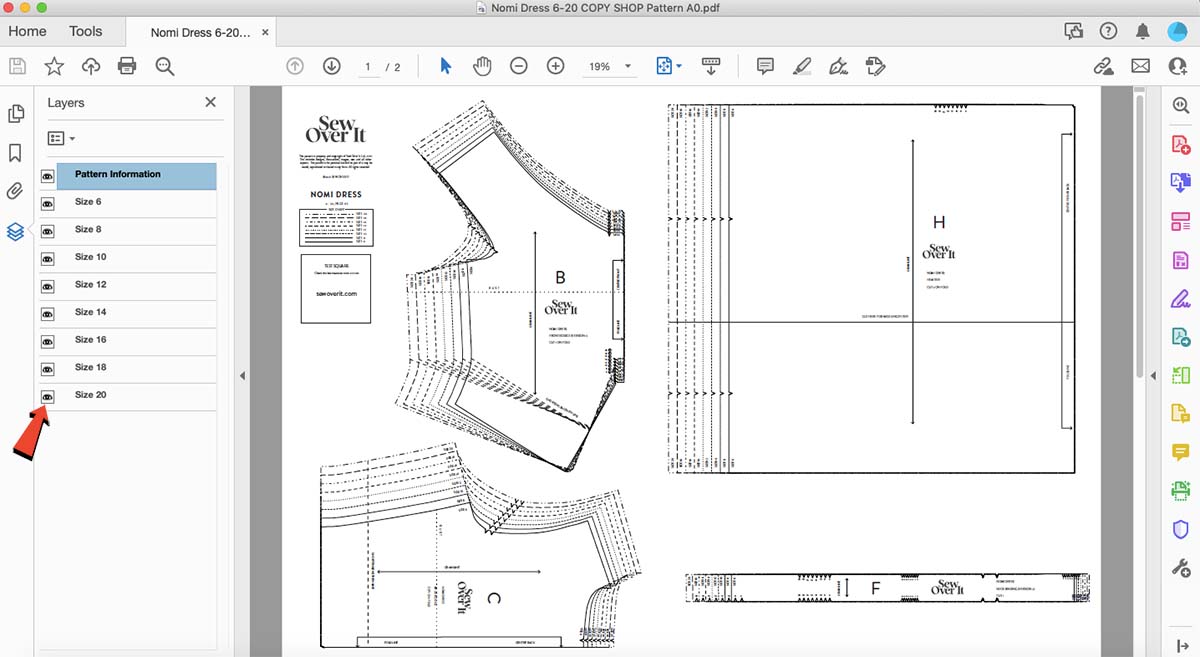
Clicking on the Layers icon will let you see all the layers, aka the sizes, that make up the pattern file. Next to each size you will see a box with an eye in it. This means that that that specific layer is currently visible. Click on the eye next to the sizes you don't want to print to make those layers invisible.
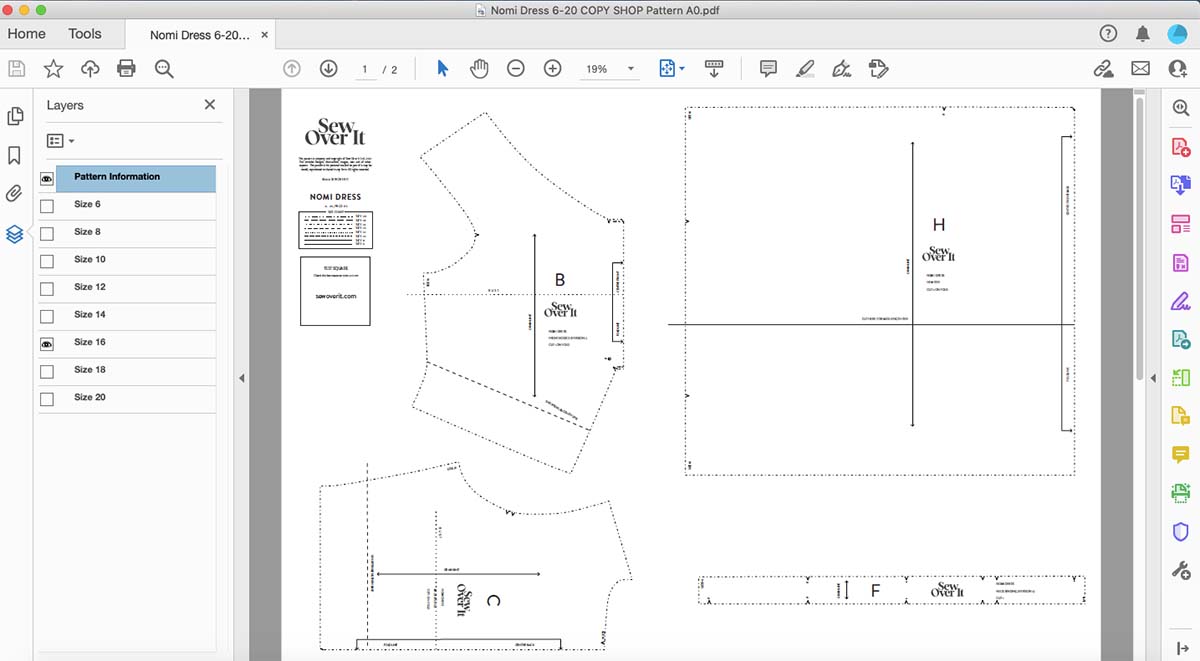
Once you've made all the other sizes invisible, you will see that the only lines that appear in the pattern file are the ones for your preferred size.
In the image below you can see that we've left only Size 16 as visible, which means that when we go to print, this is this is the only size that will come out, saving some ink and making the cutting process a little bit easier.
If you find you need to grade between sizes rather than using just one size, you can keep all your required sizes visible in Acrobate Reader and remove all others.
Find out how to grade between sizes in this video tutorial on Stitch School, our online sewing classroom.
And if printing at home sounds like too much of a faff, you can select the Copyshop option when purchasing any of our PDF patterns. You'll receive them on large sheets ready to be cut with no need to assemble!
You can also order prints of any of our PDF patterns on large A0 sheets through our A0 printing service here.